REVIEW · HOBART
Tasmania 5 Day East Coast Tour
Book on Viator →Operated by Fun Tassie Tours · Bookable on Viator
Tasmania hits hard in five days. This East Coast loop pairs small-group guiding with timed stops for icons like Port Arthur and Bay of Fires, plus meals and tastings included to keep you moving. The only drawback: it’s a packed itinerary, so if you want lots of slow wandering and long breaks, you’ll feel a bit scheduled.
I like how the trip starts with real comfort in Hobart at the Mövenpick Hotel, then strings together unforgettable coast and wildlife without long, boring transfers. You also get the practical structure of a set departure time (8:30am) and a small cap of 15 travelers, which helps the day feel organized instead of chaotic.
At $1,574.35 per person, it isn’t cheap, but most of the big costs are already handled—entries, national park passes, and plenty of food. The extra cost to watch for is optional add-ons like the chairlift across the gorge, if you choose to do it.
In This Review
- Key things that make this tour worth a look
- Hobart to Launceston in five days: how the pace really feels
- Price and what you’re really buying for $1,574.35
- Day 1 in Hobart: settling in at the Mövenpick
- Day 2: from Hobart icons to Tasman National Park and Eaglehawk Neck
- Day 3: Port Arthur, chocolate and lavender, Maria Island views, then penguins
- Day 4: East Coast Nature World, Bay of Fires, oyster farm stops, and cheese
- Day 5: Launceston on your own—how to use the free morning
- Small-group guiding: why this tour gets high marks
- Food, tastings, and included meals: how to plan what to eat
- Should you book this 5-day East Coast Tasmania tour?
- FAQ
- What time does the tour start?
- How many people are in the group?
- What’s included in the price?
- Where do you stay on the first night?
- Does the tour include tastings?
- Is Port Arthur guided?
- Is there anything not included?
- What’s the final part of the trip like?
- What happens if I cancel or change my booking?
Key things that make this tour worth a look
- Small group (max 15) means more hands-on attention and fewer bottlenecks at viewpoints
- Mövenpick Hotel in central Hobart gives you an easy Day 1 evening without extra logistics
- Icon stops with guided time: Mount Wellington, Tasman National Park, and a personally guided Port Arthur visit
- Tastings built into the route: wine, chocolate, cheese, and oysters (not just one quick sample)
- Bay of Fires + wildlife night: photogenic coast plus a guided penguin-spotting experience near Bicheno
- All entry fees + national parks passes included so you’re not hunting for tickets all day
Hobart to Launceston in five days: how the pace really feels
This 5-day East Coast tour is designed for people who want a full hit of Tasmania’s top sights without spending your time planning. You start in Hobart, build your way along the coast and historic sites, then finish in Launceston with a few hours on your own.
The small-group format (up to 15 people) matters more than you might think. Fewer people means you can actually hear your guide at viewpoints, you’re not stuck behind a busload at every stop, and you get more help with timing and where to stand for the best photos.
Just be honest with yourself about the pace. Days are busy and the day-to-day rhythm is stop-driven: scenic drive, short walk, tasting, lookout, then the next place. If you’re the type who likes to linger for an hour in one spot, plan to treat this as a highlights tour.
A few more Hobart tours and experiences worth a look

Price and what you’re really buying for $1,574.35
At $1,574.35 per person, you’re paying for convenience, time, and a lot of included costs. The value kicker here is that entrance fees and national park passes are covered, plus several meals and multiple tastings are part of the package. That’s huge on an island trip—Tahiti this is not, and Tasmania doesn’t have “cheap” attractions everywhere.
You’re also getting a guide who runs a tight schedule while still leaving room for stops like coffee at Pirates Bay/Eaglehawk Neck and a proper Port Arthur session. Those are the kinds of moments that are hard to replicate if you’re driving yourself, especially if you’re not used to back roads and coastal distances.
Where you might feel the bill is on optional add-ons you choose yourself. For example, a chairlift across the gorge is possible for $15 per person, but it’s not included. If you skip it, your spend stays predictable.
Day 1 in Hobart: settling in at the Mövenpick
Day 1 is pleasantly low-stress: arrive in Hobart City at your leisure. The tour includes your overnight stay at the Mövenpick Hotel, with check-in available from 1pm. That matters because you can arrive, get set up, then enjoy your evening without rushing to find transport or another place to stay.
Mövenpick’s appeal is location. You’re not stuck out at the edge of town; you can walk to nearby areas instead of planning every move around pickups and returns. That’s the kind of detail that quietly improves a trip, especially when the next day starts early.
What I’d do if I were you on Day 1: keep your evening simple. Go for a first look at the harbor or a casual dinner, then focus on sleep. The rest of the itinerary asks you to be ready for 8:30am starts and full days.
Day 2: from Hobart icons to Tasman National Park and Eaglehawk Neck
Day 2 is where you start stacking Tasmania’s “best of” moments right away. You begin with Constitution Dock and its Mawsons Hut replica museum area. It’s not just decorative; it gives context for early exploration and the South Pole story, plus you’ll see statues tied to that convict-to-exploration era of Tasmania history.
Next, you cruise past Salamanca Square and Battery Point. This is a scenic drive with commentary, so you get the history and the why—not just a photo stop. You then move to a slow drive where you learn about an imposing female correctional facility and what life was like for early women convicts. That’s one of those stops that adds emotional weight without taking over the day.
After that, you get a welcome break with beer and views:
- Cascade Brewery for photos and stories about the brewing industry (a quick stop, but a very “Tasmania” one).
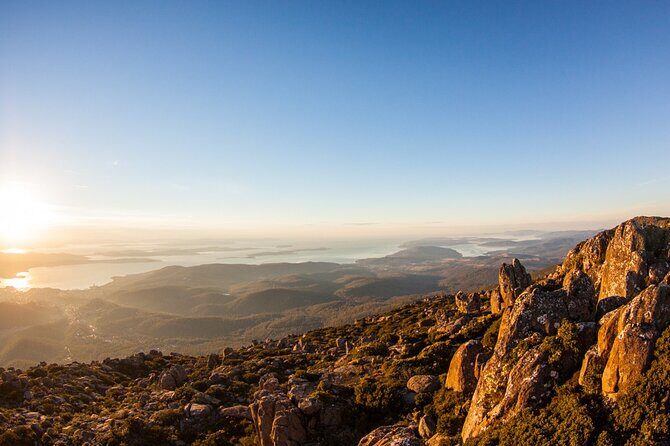
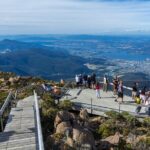
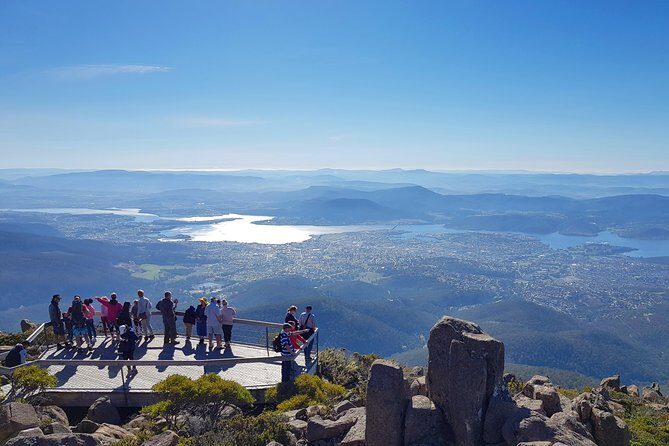
- Mount Wellington (1,275m) for sweeping panoramic views. You’re up high enough that the city and horizon feel completely different than at street level.
Then comes the coast-building momentum:
- You cross the Tasman Bridge to the Eastern Shore.
- Puddleduck Vineyard is your lunch stop, served as a platter of local produce with free wine tastings to go with it. If you like food stops that feel like experiences (not just snacks), this is one of your best lunches on the trip.
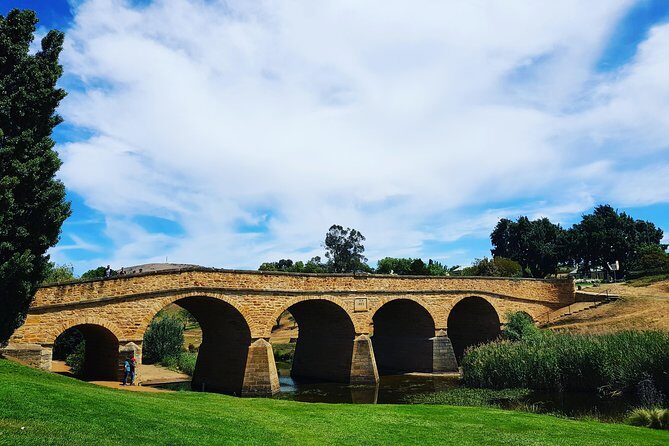
- Richmond Bridge, built in 1823 by convicts, is a standout historic bridge still in use. It’s short on time, but it’s memorable.
You head toward the Tasman Peninsula region for more iconic shoreline:
- Denison Canal for another early maritime history moment and a great photo angle.
- Pirates Bay/Eaglehawk Neck for an afternoon tea/coffee break at the lookout—this is where the tour lets you reset your feet.
- Tessellated Pavement is free and worth it: you walk on rock formations shaped into unusual patterns at the water’s edge.
Finally, you get the big nature hit:
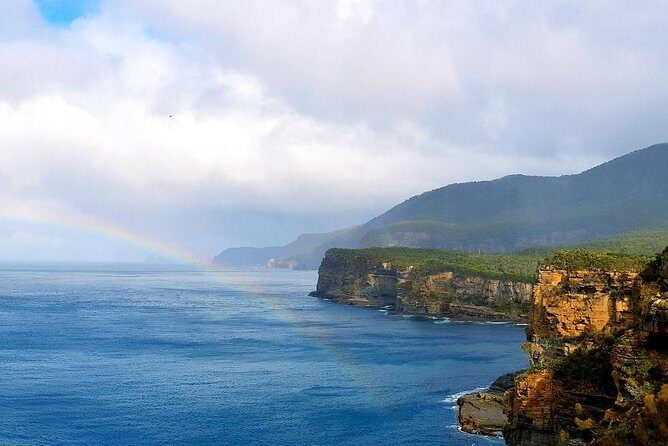
- Tasman National Park includes Tasman’s Arch (about 90m high). You can walk over the arch to viewpoints of the coastal cliffs behind. This is a classic “wow” stop—geology that looks like it was designed, not formed.
The main consideration for Day 2: it’s lots of short stops stacked together. Wear shoes you can walk in comfortably, and bring something light for wind at coastal lookouts.
Day 3: Port Arthur, chocolate and lavender, Maria Island views, then penguins
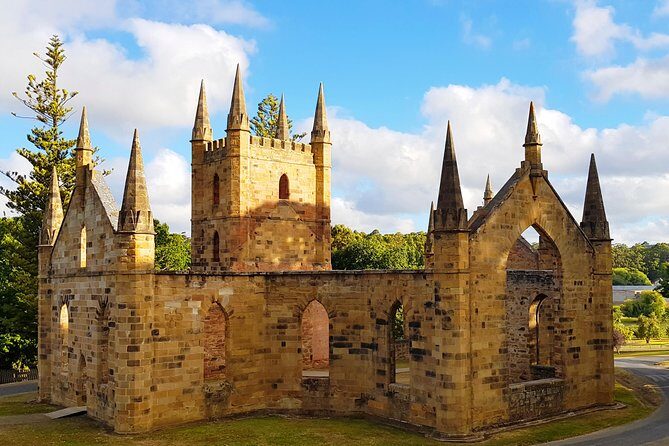
Day 3 starts with Port Arthur Historic Site, and the key word in the experience is personally guided. You get a 3-hour guided visit that covers multiple buildings, convict transportation history, and the scenic vantage points. This is the day’s anchor, and it’s likely the most emotionally intense. If you care about history and want meaning behind the ruins, this portion is the payoff for the whole trip.
You then shift to lighter stops that still feel local and hands-on:
- Federation Artisan Chocolate for hand-made chocolate tastings.
- Port Arthur Lavender to see lavender fields and browse lavender products onsite, with the farm offering coffee and snacks.
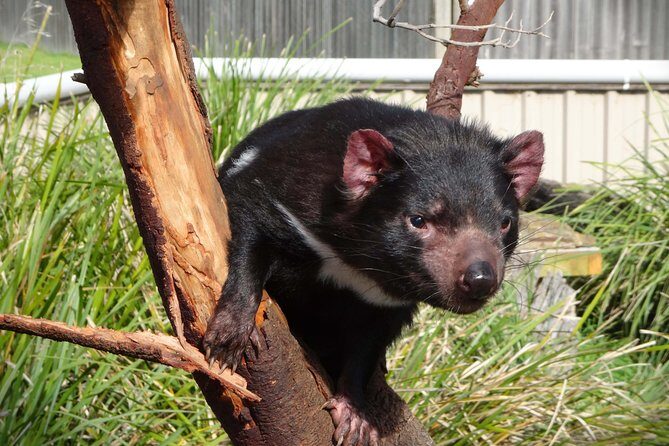
A nice change of pace comes next: you pass by Maria Island and take in coastal views from Raspin’s Beach in Orford. The guide also shares the convict connection and the current-day presence of a healthy devil population. Even though you’re not doing a full island walk, you still get the “why it matters” story.
You then hit the quirky side of Tasmania with Spiky Bridge and Spiky Beach. It’s a short stop, but it’s exactly the kind of roadside oddball that makes the route feel more than just a list of famous places.
The evening is wildlife-focused:
- At Bicheno Blowhole, you go on a fully guided penguin-spotting adventure on the rocks near the blowhole. It’s set up so you can watch penguins waddle ashore in the wild, meters away, and it runs for about 45 minutes. This is one of those experiences that’s hard to recreate without local knowledge.
If you’re prone to cold, bring layers. Night near the coast can feel chilly fast, even when daytime is comfortable.



Day 4: East Coast Nature World, Bay of Fires, oyster farm stops, and cheese
Day 4 is all about variety: animals, coastline, and food stops that don’t feel like tourist traps. You start again at Bicheno Blowhole, but this time it’s in daylight. That’s smart. Same feature, different light, better visibility for the coastline and the way the surf interacts with the blowhole.
Next comes East Coast Natureworld, a fully guided 2-hour tour at an animal sanctuary with most Tasmania native animals. The tour emphasizes animals that have been rescued from the wild or bred onsite. This gives you a structured way to see wildlife-related education without relying on luck.
Then it’s time for one of Australia’s most photographed coastlines:
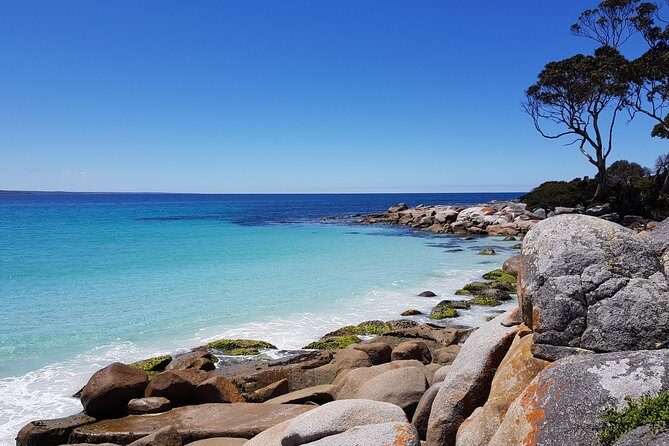
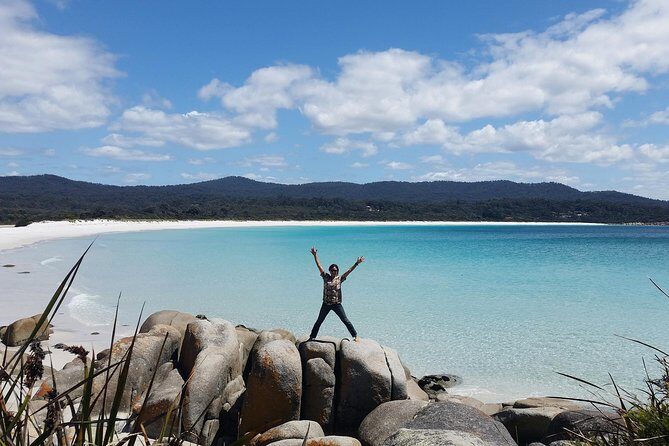
- Bay of Fires after lunch. You’ll explore the area with its white sand, ice-blue water, and those famous flaming red/orange rocks. Even with short time, the color contrast does what it’s supposed to do: it grabs your attention and makes you want more time to wander.
Food stops keep rolling:
- St Helens for fresh oyster tastings from Lease 65 Oyster Farm (Pacific oysters, as fresh as you’ll ever taste).
- Pyengana Dairy for cheese tasting and to see the robotic dairy operations behind the scenes. This is a rare combo of tasting and real-world process, not just a gift shop.
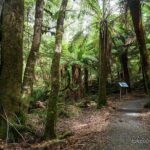
The later part of the day adds a change in scenery with a drive through a temperate rainforest area with giant Myrtle trees and man ferns. It’s scenic, but it also resets your eyes before the final stop.
You finish with coffee at the Legerwood Memorial Tree Carvings, a war memorial made using chainsaws. It’s unique and it lands emotionally, especially if you like monuments that actually tell stories about local people.
Day 4 consideration: with so many stops, you’ll want to stay hydrated and keep snacks handy if you’re a big eater. Lunch is included, but the day’s rhythm can move quickly.
Day 5: Launceston on your own—how to use the free morning
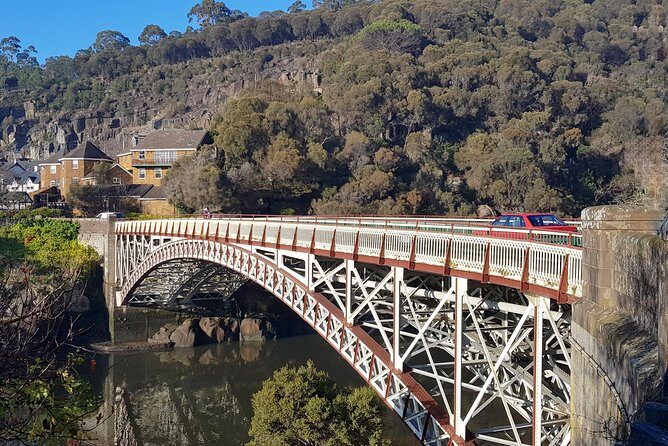
Day 5 is a softer landing. You arrive in Launceston for the final morning, and the time is unguided. You have about 3 hours, with hotel check-out by 11am, and you can rest or explore around the city mall and nearby parklands that are a few minutes walk away.
This is a good setup. You’ve had intense days of driving and guided stops, so that unstructured time lets you pick what you care about most. If you want one last photo mission, choose something walkable and easy. If you want sleep, go for it.
If you’re the kind of person who likes to connect the dots, you can also treat Launceston as a breather point where the East Coast trip ends and your Tasmania story becomes more personal and less scheduled.
Small-group guiding: why this tour gets high marks
The strongest repeated theme across the feedback is the human factor: guides who know their stuff and keep things moving without losing their friendliness. Names that come up often in positive feedback include Morgan Wilson, Robert, Matt, Carl, and Ben—people highlighting guides who were attentive, organized, and genuinely warm.
That matters on an island tour. You want someone who can explain what you’re seeing quickly and clearly, then still adjust if the group needs a breather or a second look. A small group makes that easier, and it’s one of the reasons this tour earns such a high recommendation rate.
One more practical win: you start at 8:30am, and the day’s stops are arranged so you’re not wasting the morning. You get the “must-see” items, plus enough variety that you don’t feel like you’re repeating the same type of scenic stop over and over.
Food, tastings, and included meals: how to plan what to eat
This tour is unusually strong on food inclusions. You’ll get:
- Breakfast (4) and Lunch (3) included
- tasting samples of wine, chocolate, cheese, and oysters
The big difference is that the tastings aren’t one-note. You’re not just buying a couple bites; you’re often paired with a local producer or a specific stop with tastings built in. Puddleduck Vineyard does lunch with free wine tastings. Federation Artisan Chocolate and Port Arthur Lavender add sweets and aromatics. Pyengana Dairy brings cheese tasting plus the automated dairy operations behind the scenes. Then Lease 65 Oyster Farm gives you real oyster time at St Helens.
If you’re watching alcohol, note that wine tastings are included on at least one stop, but you choose how much you take. If you’re sensitive to shellfish, the tour includes oysters as a tasting option; you can skip what you don’t want and still enjoy the rest of the stop, but decide based on your own needs.
Should you book this 5-day East Coast Tasmania tour?
Book it if you want a structured way to see Tasmania’s key East Coast highlights—Port Arthur, Bay of Fires, Tasman National Park—and you like the idea of being fed and guided along the way. It’s especially a smart choice if you’re traveling solo, because the small group size makes it easier to connect and feel looked after without needing to “find” people yourself.
Skip it (or adjust expectations) if you hate schedules or you’re the type who needs lots of free time to linger. This itinerary is packed, and the tradeoff for squeezing in so much is that you’ll spend more time moving between stops than building your own slow day.
One last tip: if you’re set on doing everything, remember the chairlift across the gorge is optional and costs $15 per person. If you want to keep your budget stable, decide early whether you’ll add it or not.
FAQ
What time does the tour start?
The tour starts at 8:30am.
How many people are in the group?
The tour has a maximum group size of 15 travelers.
What’s included in the price?
All attraction entry fees, all national park passes and fees, tastings (wine, chocolate, cheese, oysters), 3 lunches, and 4 breakfasts are included.
Where do you stay on the first night?
You stay at the Mövenpick Hotel in central Hobart, with check-in available from 1pm onward.
Does the tour include tastings?
Yes. You’ll have tasting samples of wine, chocolate, cheese, and oysters as part of the included stops.
Is Port Arthur guided?
Yes. Port Arthur Historic Site includes a personally guided 3-hour tour.
Is there anything not included?
The chairlift ride across the gorge is possible for $15 per person, and it’s not included in the tour price.
What’s the final part of the trip like?
Your final morning in Launceston is unguided, giving you about 3 hours to rest or explore around the city mall and nearby parklands.
What happens if I cancel or change my booking?
This experience is non-refundable and cannot be changed for any reason.